Getting Started with iClassPro

Lesson 1: Logging Into iClassPro

The focus of this lesson is on logging into the software, bookmarking your unique staff login page and our recommendations for compatible web browsers when using iClassPro. The focus of this lesson is on logging into the software, bookmarking your unique staff login page and our recommendations for compatible web browsers when using iClassPro.

Before getting ready to log into iClassPro for the first time, you’ll want to double-check to be sure you’re using a compatible Web browser.  iClassPro is compatible with the latest versions of Google Chrome, Mozilla Firefox, or Safari (versions 10 and up).  There are known issues with using Internet Explorer or Edge, so you’ll want to be sure that you have one of the three recommended browsers installed and that you’re using it whenever you access iClassPro.


Once you have the browser installed, you can access iClassPro.  When you signed up for your account, you should have received a Welcome email from us with your Account Name, and link to the Login Page, and your admin user name and password.  Go ahead and click the link to the Login page.  If your computer opens the link in Internet Explorer or Edge, be sure to copy the link, open one of the recommended browsers, and then access the page from there.

Once you’re at the login page, enter your account name and press “Continue.”  This will take you to your staff login page.

PRO TIP:

We recommend setting up a bookmark or shortcut to this page so you can go directly to the staff login page without having to enter your account name every time.

Enter your username and password in the appropriate fields, then click “Submit.”  They are case-sensitive, to be sure to enter them exactly as they appeared in your Welcome email.

That’s it!  You should now be logged into your iClassPro account.

show more show less

Lesson 2: Business Settings

This lesson will walk you through entering your essential business settings to get your account started off on the right foot - such as contact information which our staff will use to communicate with your business. Other settings covered in this video are essential to account setup – such as your country of business, currency, time zone, date format and more. This lesson will walk you through entering your essential business settings to get your account started off on the right foot - such as contact information which our staff will use to communicate with your business. Other settings covered in this video are essential to account setup – such as your country of business, currency, time zone, date format and more.

Now that you have logged into iClassPro, the first step is to enter your Business Information.  You can do this by clicking on the User Panel (the silhouette in the upper right-hand corner) and clicking on SETTINGS.  The system will default to the “Business Information” section.

Here, you will need to fill out your Business/School name, the name of the Business Owner and Contact Person, Contact and Billing Email addresses, Phone number, mailing address and website (if applicable).  Select the countries you serve from the list provided, and select the default state/province, Time Zone, Date Format, and currency symbol.

Note that this information is used by iClassPro and your system, and none of it will be seen by your customers, except the contact e-mail address, which is used by the system as the return address when customers use the “Forgot Password” option on the Customer Portal.  To ensure deliverability, you will want to be sure to use a domain-based email for this, tied to a domain that you own and control (usually the domain on your website). More information about this will be covered in the next lesson.

show more show less

Lesson 3: Location Settings

This lesson will explain how to update your location information which will be visible to customers in the parent portal for online registration. This lesson will explain how to update your location information which will be visible to customers in the parent portal for online registration.

The next step is to enter your Location Information.  To do this, click on “Locations” on the left-hand side of the screen (under “Billing Information”).

Here, you will need to fill out your Business/School name, the name of the Business Owner and Contact Person, Email address, Phone number, Website (if applicable), and physical address.

Note that this information will be seen by your customers on both the Customer Portal and on Statements sent from within iClassPro. The Email address you specify here is used by the system as the return address on all email communications sent from the system (except the “Forgot Password” email the Customer Portal as noted in the previous lesson).  To ensure deliverability, you will want to be sure to use a domain-based email for this, tied to a domain that you own and control (usually the domain on your website).

Use of a domain-based email is highly recommended due to changes in email standards beginning in early 2014.  Most email inboxes now detect emails sent from a server that is not owned by the same company as the reply-to email address as SPAM, and can block those emails from coming through to the recipient. Since all email communications sent from iClassPro are sent from our mail server, this will not match free email providers such as Yahoo, AOL, Gmail or Hotmail and your customers may not receive important emails, receipts and statements from you.  By using a domain-based email that you control, you can set up what is called an SPF record that gives iClassPro permission to send emails on your behalf and avoid miscommunication (and “missed” communication) with your customers.

Once you have the email address entered, you can upload graphics to be used.  The Statement Logo will be used on Statements generated by the system.  This graphic will be resized as needed, so be sure that it is large enough to be shrunk down, rather than stretched to fit.  600 pixels wide is probably a good size.

This is also where you will upload the Parent Portal Header Image that will be used for this specific location.  This graphic will also be stretched or resized to fit.  It should be at least 920 pixels wide. The height doesn’t matter, but keep in mind that the taller it is, the further your customers will need to scroll down to log in. (If you have multiple locations, you will upload a header image here for each location, and a default image in your Customer Portal settings that will be used until your customers select a specific location.  If you have only one location, the system will use the header you uploaded here at all times.)

show more show less

Lesson 4: Creating Staff Users

This lesson will cover creating unique staff users to enable them to login with specific permissions/access. Adding staff members to the iClassPro system also enables the staff members to show as possible instructors to attach to classes and camps later on. This lesson will cover creating unique staff users to enable them to login with specific permissions/access. Adding staff members to the iClassPro system also enables the staff members to show as possible instructors to attach to classes and camps later on.

In order for Staff members to be assigned to classes as instructors or log into iClassPro, they must have a Staff User profile created.

To create a new Staff user, click on the STAFF icon in the blue toolbar at the top of the screen.

Next, click the “New Staff” button on the left-hand side of the screen.

At the bare minimum, you need to give each staff member a name, a username and password on the “Details” tab, and assign them to a Staff User Group on the “Permissions” tab.  Entering an email address on the “Details” tab will also allow them to use the “Forgot Password” function if they lose or forget their password and cannot log in.

Assigning the Staff User Group is what actually allows the Staff member to log in.  Staff members assigned to the same user group will all have the same permissions within the program.  You can grant additional permissions on a per-user basis by clicking the “Advanced User Permissions” button on the “Permissions” tab.

If needed, you can customize the Staff template under SETTINGS>SETUP>STAFF SETTINGS>STAFF TEMPLATE.  This area is also where you can create additional Staff Titles and edit or create Staff User Groups.

When editing or creating Staff User Groups, it is important to remember that each section of permissions determines what staff members in that group will be allowed to see or do within the program.  “Application Access” simply grants them permission to log into specific parts of the program.  Once they are logged in, which pages they can access and what they can actually do are determined through their “Page” and “Task” permissions, respectively.  “Reports” permissions determine which reports they can run if you give them access to the REPORTS page.

Important Note:
Even if a staff member does not have permission to access the REPORTS page, they must have permission to the “Statements” report to be able to email statements from Family Ledgers or run the “Statements” task from the TRANSACTIONS page.

show more show less

Lesson 5: Creating Family & Student Records

In this lesson, you will learn how to create families and add students to the system and how to customize the available fields for your needs. In this lesson, you will learn how to create families and add students to the system and how to customize the available fields for your needs.

The fundamental account structure in iClassPro is built on a Family/Student relationship.  First, a Family account is created, then students are created under the Family account.

To create a new family, go to the FAMILIES page in the blue toolbar at the top of the screen, then click the “New Family” button on the top of the left-hand side menu.

On the “Details” tab, enter the name(s) of the guardians and their contact information, including mailing address, phone numbers and email address.  Note that the Primary email address will be used by the system when emailing receipts and will be the email address the parent will use to log into the Customer Portal. There are also additional fields if you click the words “View More” under the Email address fields.

Once you have entered the family details, click the “Save” button. If you have a payment gateway set up that allows you to save payment information, you can enter this under the “Payment Options” tab.

If there are not enough fields available to enter the information you need, or if you do not have the options you need from the drop-down menus, you can customize the template and menu options under SETTINGS > SETUP > FAMILY SETTINGS.

Here, you can add additional fields by updating the “Family Template”.  When you save the changes here, all existing families will be updated to use the new template, and the template will be used for any new family accounts moving forward. This is also where you can customize the drop-down menu options for Relationships and Referral Sources (for the “How Did You Hear About Us” option). There are also options to set Statement Options and Default Enrollment Email Options (these will be covered in more detail in later lessons).

If needed, you can customize the Phone Types and Email Types under SETTINGS > SETUP > GENERAL SETTINGS.

Now that the family has been created, you can add students by clicking the “New Student” button at the upper right-hand corner of this screen.  Be sure to enter the birthdate and gender, as this criteria will be used to auto-approve enrollments created through the Customer Portal (if you have that setting enabled). Once you have entered the student information, click “Save” to save the student.

If needed, you can customize the Student template under SETTINGS > SETUP > STUDENT SETTINGS > STUDENT TEMPLATE.  This area is also where you define your Grade structure and how it relates to student ages, and set other Student Options (including how the student’s age is in the system).

show more show less

Lesson 6: Creating Your Class Schedule

In this lesson, you will learn about the essential settings for classes and how to create them. Classes are best used for tracking enrollments which last several weeks or longer on a recurring schedule. In this lesson, you will learn about the essential settings for classes and how to create them. Classes are best used for tracking enrollments which last several weeks or longer on a recurring schedule.

Before setting up classes, you will need to define certain options within the SETTINGS menu. Go to Settings > Setup > General Settings

Now expand the GENERAL SETTINGS area.  In this section, you’ll need to be sure that you have your Programs created.

Programs serve multiple purposes:

  • They group similar charges together for financial reporting purposes.
  • Classes assigned to the same Program will inherit Discount Schedules and Blackout Schedules from that Program
  • Class Programs are viewable by Parents in the Customer Portal in the Program Filter to help them locate classes.

If you need to create a new Program, use the “Create New Program.”  Using the “Non-Class Program” option designates that Program to be used for internal financial reporting purposes only. These programs cannot be assigned to classes or camps, and cannot be viewed in the “Programs” filter on the Customer Portal.

The other options you’ll need to define are under the CLASS SETTINGS area.  When you expand this section, you can define several options:


  • Sessions or Rolling Sessions
    SESSIONS are used to both control class enrollment and billing periods.  When a class has a Session attached to it, students enrolled in the class inherit their start date and drop date from the Session and will drop automatically when it ends.  The Session dates also control the billing period for proration purposes (meaning the system will take into account all of the times the class will meet within the Session will prorating for late enrollments, early drops, or blackout dates).

    ROLLING SESSIONS are only used to control the billing period for proration purposes. While students enrolling in a class with a Rolling Session attached to it will inherit their start date from the Session, they are not assigned a drop date and simply “roll over” into the next Rolling Session that is attached to the class.
     
  • Levels
    As opposed to skills (which are used to evaluate student progress), Levels are assigned to classes.  Levels are available as a filter on the Customer Portal, and can also be used to generate a Level Summary Report to obtain a count of students and enrollments in classes at particular Levels (as opposed to the Program Summary Report, which reflects students and enrollments based on the Class Program). Levels are optional, so if your facility does not use them you can skip this section.
     
  • Tuitions
    Tuitions define how much will be charged for a particular class.  This can be a flat amount that is charged monthly or by Session, or an hourly rate (if you are billing hourly). If you are billing hourly, keep in mind that this rate is charged per hour, so if your classes are more or less than an hour in duration, this will not match the per-class price you quote your customers (for example, a 45-minute class that charges $15 per class will actually charge $20 per hour and prorate to reach your quoted price).


To create a basic class, go to the CLASSES page, then click the “New Class” button at the top of the menu on the left-hand side of the screen. This will open up to the class “Details” tab.  This tab is where you will enter your basic information about the class. You will need to fill out the following required fields:

  1. Class Name
  2. Class Program.  The class will inherit discount schedules, blackout dates, certain promo codes and skill trees based on which Program is selected.
  3. Class Requirements, including minimum and maximum age requirements, the maximum number of allowed enrollments in the class, and the student gender requirements. This information will be used by the system to determine if a student is eligible for the class, and if there are any enrollment spots left.

The other options on this tab are optional.

Scroll back up to the top of the screen and click on the “Billing” tab. This is where you specify your Billing Schedule and Tuition, and how the system will handle discounts and proration related to the class.

A “Billing Schedule” is used to determine which students will be charged when you run your billing.  A Tuition defines how much the students will be charged.  It is possible to have more than one Billing Schedule and Tuition set up per class so different students within the same class can be charged different amounts, such as one Tuition for students who pay monthly and another for students who pay for an entire Session at once.

The option to Bill Hourly is used if you charge for the number of hours a student takes, rather than a flat rate for the month or Session.  When this option is checked, the system will figure the number of hours taken within the billing cycle defined by the Billing Schedule and charge that Tuition amount per hour taken.  We will cover hourly billing more in-depth during subsequent lessons.

Be sure to set the options to allow discounts and allow proration according to how your facility charges.

Scroll back up to the top of the screen and click on the “Bill Dates” tab.  If your classes bill over the course of a calendar month, you do not need to make any changes to this screen.  If your classes bill according to a Session or Rolling Session, you will need to choose “This Class Bills According to Custom Date Ranges” and then choose the appropriate option to select a Session or Rolling Session to attach to the class.

Back at the top of the screen, click on the “Schedule” tab. This is where you define the day and time that the class will meet. Add class timeslots by selecting the day of the week, then specify the start time and duration, and click “Add Time Slot” to add it to the Schedule.

Be aware that a student will be enrolled for all days and times on the Schedule, so if you want unique enrollments for each class day, you will want to set up a separate class for each time the class meets.

These are all of the required fields to create a basic class.  If desired, you can go ahead and assign Instructors, Keywords, or Skill Trees before saving.  Promo Codes cannot be assigned until the class has been saved.

Advanced options relating to classes will be covered in subsequent lessons.

show more show less

Lesson 7: Setting Up Discounts

In this lesson, class discounts are explained in detail. Discount schedules are available to offer multiple class or multiple sibling discounts for class enrollments. In this lesson, class discounts are explained in detail. Discount schedules are available to offer multiple class or multiple sibling discounts for class enrollments.

Discount Schedules are used in iClassPro to give a discount for students taking multiple classes or siblings within the same family.  They are also used in conjunction with hourly billing to adjust Tuition based on the number of hours of classes a student takes.

IMPORTANT NOTE: iClassPro takes all enrollments into consideration when calculating the number of classes taken. So while it is possible to keep individual classes from allowing discounts entirely, it is not possible to base discounts on enrollments in only certain programs or classes.

Discount schedules can be created under SETTINGS>SETUP>CLASS SETTINGS>DISCOUNT SCHEDULES.  Once there, use the “Create New Discount Schedule” button to launch the New Discount Schedule window.

On the “Details” tab, give the Discount Schedule a name, then set your options to determine how the system will calculate the discounts.  Let’s look at the option and how they affect the discounts:

Under “Count Classes/Hours By” you have the options to count “One at a Time” or “Total.”  If you count “One at a Time”, the system will consider each class or hour independently and will give a discount to each class based on how it is ranked according to its Tuition price.  If you count by “Total”, it will count the total number of classes the student is taking and will give all classes the same discount that corresponds with that number of classes.

If you are using Hourly billing, the system will calculate the total number of hours each class will meet during the billing period (if you choose “One at a Time”) or the total number of hours the student is taking when the hours for all classes are added together (if you choose to count by “Total”).

Under “Count Students By” you have the options to count “One at a Time” or “Total.”  If you count “One at a Time”, the system will consider each student independently and will give a discount to each class based on how the student is ranked according to the “Students Ordered By” option (which will be covered next).  If you count by “Total”, it will count the total number of students in the family and will give all students the same discount based on the total number of students (so if there are two students in the family, they will both receive the Student 2 discount).

The “Students Sorted By” option allows you to rank the students according to which student is taking the most expensive individual class, or by which student is paying the highest total Tuition once all of their class Tuitions are added together.

The “Minimum Charge Amount” can be used to set the minimum amount you want the system to charge, should the discounts result in a particularly low Tuition price.

Once you have filled out the “Details” tab, scroll back to the top of the screen and click on the “Tables” tab.

The discount table actually defines the discount you expect to give based on enrollments.  On the discount table, columns represent the number of students in the family, and rows represent the number of classes (or hours, based on your settings on the “Details” tab).

You will enter the amount you wish to discount in the appropriate cell on the table.  For example, the discount Student 1 should receive on their second class should go in column one, row two. This discount can be entered as either a whole number (without a currency symbol) or a percentage (with the percent sign).

If you have multiple Billing Schedules set up on your classes, you can have a different discount table for each Billing Schedule.  Simply choose the appropriate Billing Schedule from the drop-down menu under “Add a New Table For a Billing Schedule” and click the “Add a New Table” button.  This will add the Billing Schedule as a new tab in the table section.

If you offer employee, service or member discounts, these can be set up on the “Special Discounts” tab.  This is also where you will enter the early bird discount price.  Please note that for families to receive these discounts, they must be enabled on the “Details” tab of their family profile.  To do this, go to the Families page and locate the family who should receive the discount.  Click the pencil next to their name, then scroll down and click on the words “View More” under the Email address fields.  This will expand and you will see the options to enable the different discounts at the bottom of the tab.

Once you have entered all of the information, click “Save” to save the Discount Schedule.  In order for classes to recognize these discounts, you need to attach the Discount Schedule to the program under SETTINGS>SETUP>GENERAL SETTINGS PROGRAMS. When you do this, all classes that are attached to that particular program will inherit the discount schedule and will recognize it if you allowed Discounts on the class.  Alternatively, you can attach it directly to a class by using the “Discount Schedule Override” option at the bottom of the class “Billing” tab.

While not technically “discounts”, the system can prorate for Blackout Dates if you wish.  “Blackout Dates” are dates when your facility will be closed and therefore will not be holding classes.  You can set up a Blackout Schedule under SETTINGS>SETUP>CLASS SETTINGS>BLACKOUT SCHEDULES.

show more show less

Lesson 8: Creating Your Camp Schedule

In this lesson, you will learn about the essential settings for camps and how to create them. Camps are best used for tracking short term enrollments and one-time events. They can be set up with a forced schedule or a flexible one where customers can select one or more time periods within the camp to attend. In this lesson, you will learn about the essential settings for camps and how to create them. Camps are best used for tracking short term enrollments and one-time events. They can be set up with a forced schedule or a flexible one where customers can select one or more time periods within the camp to attend.

Before setting up camps, you will need to define certain options within the SETTINGS menu. Start by going to SETTINGS > SETUP > GENERAL SETTINGS.

In this section, you’ll need to be sure that you have your Programs created.

Programs serve multiple purposes:

  • They group similar charges together for financial reporting purposes.
  • Camp programs are viewable by Parents in the Customer Portal in the Program Filter to help them locate camps.

If you need to create a new Program, use the “Create New Program.”  Using the “Non-Class Program” option designates that Program to be used for internal financial reporting purposes only. These programs cannot be assigned to classes or camps, and cannot be viewed in the “Programs” filter on the Customer Portal.

The other options you’ll need to define are under the CAMP SETTINGS area.  When you expand this section, you can define several options:

  • Camp Types
    Camp Types are used on the Customer Portal to help group similar camps together.  Parents will see the Camp Type in the menu bar on the left-hand side of the screen, below the link to “Classes.”

    To create a new Camp Type, expand the “Camp Types” section and click the “Add New Camp Type” button.  On the screen that comes up, enter the camp type name along with the plural form.  The system will use the camp name if there is only one active camp of that type, and will use the plural form if there are multiple active camps of that type.
     
  • Pricing Schedules
    The “Pricing Schedule” is what the system uses to determine how much to charge for a camp.  You can use the same Pricing Schedule for multiple camps, as long as they charge the same way.

    Click the pencil next to “Pricing Schedule” to bring up a list of your existing Pricing Schedules. To create a new Pricing Schedule, click the “Create New Pricing Schedule” button.

    When you create a new Pricing Schedule, you’ll start by giving it a name. Enter this in the appropriate blank at the top of the window.

    Next, you’ll choose how you want the system to count multiple students/attendees from the same family. If you count them “One at a time”, the system will charge the first student in the family the prices in column one of your Pricing Schedule, charge the second student the prices in column two, and so on.  If you count them by “Total”, the system will charge all students in the family based on the total number of students (so if there are two students in the family, they will both be charged the prices in column two).

    If you will be charging a deposit for the camp upon enrollment, fill out the “Student/Attendee Deposit” table to reflect how much you want the family to pay when they enroll.

    The “Students/Attendees” table defines how much the system will charge based on how many blocks of time they register for.  Columns on this table represent the students in the family; rows reflect the possible blocks of time they may register for.  Pricing on this table is cumulative, meaning that the price in row one is the price you wish to charge for one block of camp time – the price in row two is the total price you wish to charge if they register of two blocks, and so on.  You can reflect multi-block discounts by entering the adjusted total in the correct row.

    Discounts for multiple siblings will be reflected in their pricing.  If you give student two a 10% discount, then the pricing in column 2 should be 10% less than the pricing in column 1.

    If you offer employee, service or member discounts, these can be set up on the “Special Discounts” tab.  This is also where you will enter the early bird discount price.

    NOTE: The early bird discount is only applicable if the charges are created within the Admin Portal.  Enrollments through the Customer Portal will always charge the full price on the Pricing Schedule.

    Once you have set up the pricing schedule, Save and Close the Pricing Schedule and exit the Pricing Schedule Screen.

To create a basic camp, go to the CAMPS page, then click the “New Camp” button at the top of the menu on the left-hand side of the screen. This will open up to the camp “Details” tab.  This tab is where you will enter your basic information about the camp. You will need to fill out the following required fields:

  1. Camp Name
  2. Camp Program.  This will be used on financial reports to report income related to the camp, and camps will inherit skill trees attached to the Program selected.
  3. Camp Type. This is used to help group camps together on the Customer Portal.
  4. Camp Requirements, including minimum and maximum age requirements, the maximum number of allowed enrollments in the camp, and the student gender requirements. This information will be used by the system to determine if a student is eligible for the camp, and if there are any enrollment spots left. Note that maximum enrollments for camps is counter per camp block, so if you allow parents to choose days, some blocks may fill up quicker than others.
  5. Payment Settings.  This is where you will select the Camp Pricing Schedule to use and the Amount Due at Signup.  If you charge sales tax for camp enrollments, you can enable this here as well.
  6. Camp Dates. This designates the time period when the camp will be held.  If it is a one day camp both the start date and end date will be the same.
  7. Allowed Registration Dates. This is the date range when the camp will appear on your Customer Portal for online registration if you have the option to “Show on Web” enabled.


Scroll back up to the top of the screen and click on the “Parent Portal” tab. This is where you define how the system will handle enrollment options related to the camp.

  1. Show on Web. Enabling this will allow visitors to view the camp on your Customer Portal.
  2. Allow Web Registration. Enabling this allows visitors to submit enrollments through the Customer Portal. If you enable “Show on Web” but not “Allow Web Registration”, they will see the camp listed but there will not be an option to enroll online.
  3. Allow Parents to Choose Days. Enabling this option will allow parents to choose individual days or camp blocks during the Camp Dates. If it is not enabled, students will be enrolled in all camp blocks when they are enrolled.
  4. Auto Approve Requests. Enabling this option means that a student’s enrollment will be automatically approved and created if they meet the camp age and gender requirements and there is an opening available.

    IMPORTANT NOTE: If you do not enable “Auto-Approve Requests”, parents will not be charged anything when enrolling online since the system does not know if you will approve the enrollment or not.

The option “Display Schedule Alias in Place of Schedule Details” and the User Defined tab will be covered during subsequent lessons.

Back at the top of the screen, click on the “Schedule” tab. This is where you define the day and time that the class will meet.

The “Schedule Type” can be used to specify how you wish to create camp blocks.  With a “Weekly” schedule, you select the days of the week and times when the camp will meet and the system will automatically create camp blocks for each of those days within the Camp Dates.  If you use a “Daily Schedule”, you specify the exact dates and times when the camp will be held.

Once you have chosen a Schedule Type, add camp blocks by selecting the day of the week or date, then specify the start time and duration for each camp block, then click “Add Time Slot” to add it to the Schedule.  If the camp meets twice a day, you will need to create two time slots for each day.

These are all of the required fields to create a basic camp.  If desired, you can go ahead and assign Instructors, Keywords, or Skill Trees before saving.  Promo Codes cannot be assigned until the camp has been saved.

Advanced options relating to camps will be covered in subsequent lessons.

show more show less

Lesson 9: Charges

In this lesson, charges are discussed in detail – including the different types of charges, why they are important and the different ways that charges can be added to customer accounts (including mass charging). In this lesson, charges are discussed in detail – including the different types of charges, why they are important and the different ways that charges can be added to customer accounts (including mass charging).

Being able to create charges and payments in iClassPro provides the basis for financial reporting.  Over the next two lessons, we will cover the various functions related to these tasks. We will look at creating charges first.

Before you can create charges in iClassPro, you need to create Charge Categories.  Charge Categories are labels you create to designate what a particular chare is for, such as “January Tuition”, “Competition Fee” or a specific item such as “Leotard.”  Take some time to think about exactly what you need to know for your financial reporting and create the Charge Categories you need under SETTINGS > SETUP > GENERAL SETTINGS > CHARGE CATEGORIES.

Pro Tip: Use the “Expiration Date” function to make old charge categories stop appearing on your drop-down menus. This leaves them in the system for financial reporting purposes, but you won’t have to scroll past them when creating new charges.

Once you have the Charge Category set up, you are ready to create new charges.  This can be done in several ways.


Individual Charges
These are charges created directly on a family ledger using the “New Charge” button.  When you launch the “New Charge” window, you will specify a Charge Title, the Charge Date and Due Date of the charge.  If the Charge Title is left blank, it will match the Line Item Title that is generated when you create the Line Item.

The “Charge Date” is when a charge is considered to be “live”, meaning that payments applied to it will show up on your financial reports. Until the charge date arrives, any payments applied towards the charge will show as “Unapplied” on your financial reports since the charge technically doesn’t exist yet.  On the charge date, an adjustment will be reflected on your Program Deposit Split Report showing the payment moving from “Unapplied” to being applied to the correct Program. If the family showed an unapplied payment on other financial reports they will no longer show after the charge date.

The “Due Date” is used by the system to define when a charge is considered late if no payment is applied to it.  The “Due Date” is also used when running the Payments task to help determine which charges should be considered when collecting payment (we will cover this in more detail in the “Payments” section).

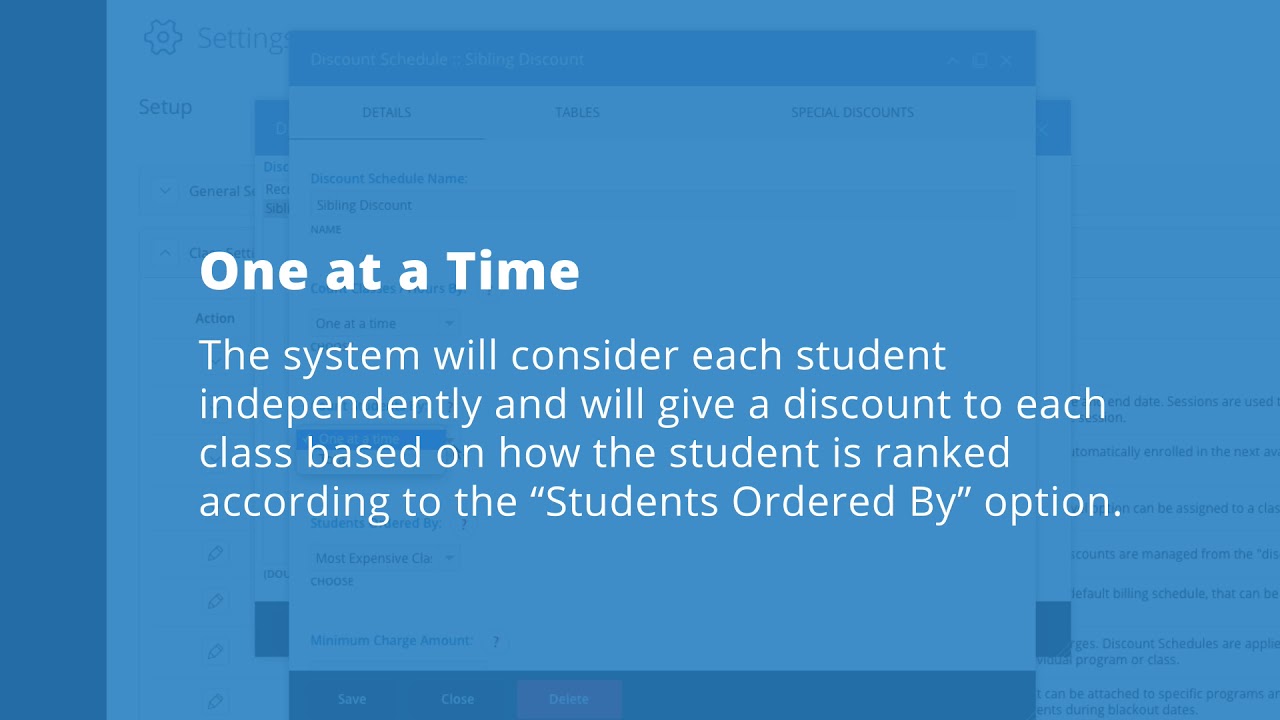
The “Early Bird Date” can be used in conjunction with Tuition Charges to give a reduced Tuition cost if paid by that date.  After that date the Tuition will revert to the full amount. (Note that the Early Bird discount must be defined on the “Special Discounts” tab of the Discount Schedule used by the class or camp for this to work.)


Next, you will choose a “Line Item Type”.  Based on the Line Item Type you choose, you will follow these steps to create the charge:

  • Class Tuition – this Line Item Type is used when created a charge tied to a particular class enrollment. The Program will be automatically populated based on the Program attached to the Class, and the amount will automatically populate based on the Tuition attached to the enrollment (although this can be manually edited if needed).
  • Camp Tuition – this Line Item Type is used when created a charge tied to a particular camp enrollment. The Program will be automatically populated based on the Program attached to the Camp, and the amount will automatically populate based on the Tuition attached to the enrollment (although this can be manually edited if needed).
  • Anniversary – this Line Item Type is used when creating an Anniversary Fee charge.  You will need to manually select the Program and Charge Category for the charge, but the amount will automatically populate based on the amount specified under SETTINGS>SETUP>GENERAL SETTINGS > ANNIVERSARY CHARGES or any Anniversary Fee Override associated with the family or student. (This amount can be manually edited if needed). Important Note: Anniversary charges MUST use the “Anniversary” Line Item Type to be recognized as such by the system.  Creating an Anniversary Fee charge using any other Line Item Type may result in the family or student being charged again. (If the charge is created through the Customer Portal or using the “Anniversary Charges” task on the TRANSACTIONS menu, it will use this Line Item Type automatically.)
  • Other – this Line Item Type is used to create a general charge.  You will be able to specify the Program and Charge Category for this charge and manually set the amount.
  • Discount – this Line Item Type is used to record a discount that is applied to all line items within the same charge.
  • Promo Code – this Line Item Type used to record the use of a Promo Code.  (Note that the Promo Code line item must be created first and saved, then you will need to add a new line item for the actual Tuition charge.)


Once you finish adding the information for a specific charge, click “Add Line Item” if you need to add an additional line item (such as a Discount, or a Tuition charge if you chose “Promo Code”).  Once all line items are entered, you can click “Save” to add the charge to the ledger or “Save and Make Payment” to save the charge and launch the “New Payment” window.

Group Charges (Mass Charges)
Group charges or non-Tuition charges that need to be applied to all students in a particular class or program. You can create a group charge from either the Students or Families screen, depending on whether you want to create one charge per student or one charge per family, respectively.

Set your Enrollment Status filter to ACTIVE to limit the results to currently active enrollments. (Failing to do so will result in a charge for every student or family who has ever been enrolled in the class.) If you are adding a group charge for enrollments that have not yet started, change the “Active On” date to a date when the enrollments will be active.

Use the "All Classes" or “All Programs” filters to select the classes you want to charge. This will show only students or families with active enrollments in that class or Program.

Click "Select All", then click the icon in the toolbar at the bottom of the screen that looks like two stacks of coins. This will launch the "New Charge" window.

Fill out the “New Charge” window as you would if you were charging a single family. When you click SAVE it will create the same charge on all of the students or families you had selected. (If you create the charge from the Students page, the student name will be appended to the Charge Title.)


Class Tuition Charges
The “Class Tuition Charges” task is used to charge all students enrolled under a specific Billing Schedule at one time.

To access the “Class Tuition Charges” task, click on the TRANSACTIONS button on the right-hand side of the blue toolbar at the top of the screen.  The menu will default to “Class Tuition Charges” since that is the first item on the menu on the left-hand side of the screen.

To create Class Tuition Charges:

  • Choose the Charge Category that will be assigned to the charges that are created.
  • Choose the Billing Schedule that you are creating charges for. Only students with this Billing Schedule attached to their enrollment will be charged when you process the task, so if you have multiple Billing Schedules attached to your classes, you may need to run this task multiple times to be sure that all students get charged.
  • From the “Student Active” filter, choose the option that best matches your guidelines for enrollments to be considered.
    • “In the Month of” will look at all enrollments within the specified month and will ignore all enrollments that drop before or after that date range. We generally recommend this option if you bill based on the calendar month.
    • “Within the Range of” allows you to specify a start and end date for the enrollment window and will ignore all enrollments that drop before or after that date range. We generally recommend this option if you bill by Sessions or Rolling Sessions.
    • “As of Date” allows you to specify a specific date and will ignore all enrollments that drop before or after that date.
  • Specify the Charge Date and Due Date of the charge that will be created.
  • If you have an Early Bird Discount defined on the “Special Discounts” tab of the Discount Schedule used by the classes you are billing for and wish to enable it, check “Allow Early Bird Discounts” and specify the Early Bird Date.
  • If you charge tax for tuitions, check the “Charge Tax” box and choose the appropriate tax rate.
  • “Prevent Duplicate Charges” is generally enabled so the system will check to see if a student has already been charged for a particular enrollment using the Charge Category you specified in step one.  By default it looks back 12 months to see if the charge exists; if you reuse Charge Categories every year you may wish to use the “Within the Past” drop-down menu to change this window to “6 Months.”


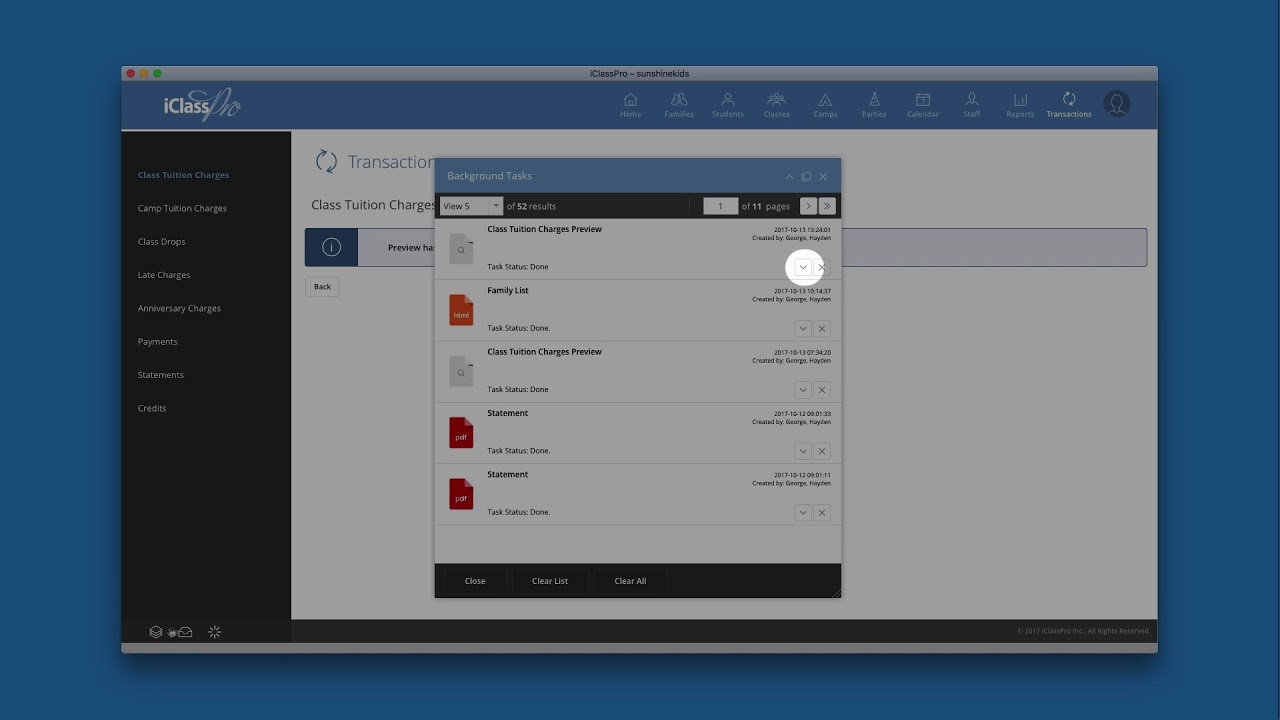
Once all of your options have been entered, click “Preview” to generate a Class Tuition Charge preview.  Depending on the number of charges, this may open automatically, or you may receive a message that it has started as a Background Task to allow you to keep working while it is being generated.  If you receive this message, just click on the “Background Tasks” icon in the bottom left-hand corner of the screen to open it, then click on the task result to open the Preview in a new tab.

When the Preview opens, you will see a list of all Families, Students, Class Enrollments, and the amount they will be charged.  Any students with a tuition override will be noted. Any duplicate charges the system detects will also be noted and that enrollment deselected by default so they won’t be charged again.

Next to each tuition charge is a drop-down arrow.  Clicking on this will expand the tuition to explain how the system arrived at that amount, showing any blackout dates, discounts and how the student was ranked for discounts (such as Class X, Student Y).  If you find any discrepancies, you will need to edit the enrollment or class to correct them, then generate a new Class Tuition Charges preview so the system will use the latest updates when calculating prices. You can also download this preview as a CSV file to open in your spreadsheet software if you prefer using the “Save as CSV” option at the bottom of the list. (If you do make changes, it is a good idea to delete the previous preview from the Background Tasks so it is not accidentally opened and processed instead.)

Once the preview looks correct to you, you can process it by pressing the “Process” button at the bottom left-hand side of the list. When you process the preview, it places the charges on the Family ledger, but does not collect payments.


Camp Tuition Charges
The “Camp Tuition Charges” task is used to charge all students enrolled in a specific camp at one time.  If the student has already been charged for their camp enrollment, they will not be charged again.

To access the “Camp Tuition Charges” task, click on the TRANSACTIONS button on the right-hand side of the blue toolbar at the top of the screen.  On the menu on the left-hand side of the screen, choose “Camp Tuition Charges.”


To create Camp Tuition Charges:

  • Under “Billing Type” choose the appropriate option for the type of billing you want to do.  Choosing “Full Un-billed Amount” will charge everything still due on the camp enrollment. Choosing “Deposit Only” will create only a charge for the Deposit amount (if this amount is specified on the Camp Pricing Schedule and “Deposit Due Only” is enabled as “Amount Due at Signup” in the Camp Payment Settings).
  • Choose the Charge Category that will be assigned to the charges that are created.
  • For the “Active As of Date” filter, enter a date when the camp enrollment will be active (usually the first day of camp).
  • Specify the Charge Date and Due Date of the charge that will be created.
  • If you select “Bill Only Selected Camps”, the system will show a list of all camps that will be active on your “Active As of Date” and you will be able to select only certain camps to charge.  Otherwise the system will create charges for all camps active on that date.
  • If you have an Early Bird Discount defined on the “Special Discounts” tab of the Pricing Schedule used by the camps you are billing for and wish to enable it, check “Allow Early Bird Discounts” and specify the Early Bird Date.

Note that there is no option as to whether or not to charge tax.  This option is set on each individual camp and the system will charge (or not charge) accordingly.

Once all of your options have been entered, click “Preview” to generate a Camp Tuition Charge preview.  Depending on the number of charges, this may open automatically, or you may receive a message that it has started as a Background Task to allow you to keep working while it is being generated.  If you receive this message, just click on the “Background Tasks” icon in the bottom left-hand corner of the screen to open it, then click on the task result to open the Preview in a new tab.

When the Preview opens, you will see a list of all Families, Students, Camp Enrollments, and the amount they will be charged.  Any students with a tuition override will be noted. Any duplicate charges the system detects will also be noted and that enrollment deselected by default so they won’t be charged again.

Next to each tuition charge is a drop-down arrow.  Clicking on this will expand the tuition to explain how the system arrived at that amount, showing any blackout dates, discounts and how the student was ranked for discounts (such as Block X, Student Y).  If you find any discrepancies, you will need to edit the enrollment, camp settings or camp pricing schedule to correct them, then generate a new Camp Tuition Charges preview so the system will use the latest updates when calculating prices. You can also download this preview as a CSV file to open in your spreadsheet software if you prefer using the “Save as CSV” option at the bottom of the list. (If you do make changes, it is a good idea to delete the previous preview from the Background Tasks so it is not accidentally opened and processed instead.)

Once the preview looks correct to you, you can process it by pressing the “Process” button at the bottom left-hand side of the list. When you process the preview, it places the charges on the Family ledger, but does not collect payments.


Late Charges
The “Late Charges” task is used to assess a charge to all families with unpaid charges that have passed their Due Date.

To access the “Late Charges” task, click on the TRANSACTIONS button on the right-hand side of the blue toolbar at the top of the screen.  On the menu on the left-hand side of the screen, choose “Late Charges.”


To create Late Charges:

  • Enter a “Late Fee Description.”  This description will be used as the charge title for the charge that is created.
  • Choose the Charge Category and Income Program that will be assigned to the charge that will be created.
  • Enter the amount of the fee to be charged.
  • Under “Fee Type”, choose the appropriate setting for how you want to charge the fee:
    • Charge a Single Flat Fee Per Family – this option will charge the fee once per family, regardless of the number of active students in the family or number of charges that are overdue.
    • Multiply Fee by Active Students Family – this option multiply the fee by the number of students in the family with an active enrollment, regardless of the number of charges that are overdue.
    • Multiply Fee by Overdue Charges – this option will multiply the fee by the number of overdue charges (as defined by the “Late Fee Search” filter).
  • Specify the Charge Date and Due Date of the charge that will be created.
  • Under “Late Fee Search”, choose the appropriate setting for how you want to match late fees:
    • “Charges that are Overdue” – this option will look for any fee that is overdue, regardless of the charge category.
    • “Charges in Charge Category” – this option will look only at fees using the Charge Category you choose.
  • Set the “Minimum Overdue Charge Amount” – any charges that have less than this amount outstanding will not be considered for a late fee.


Once all of your options have been entered, click “Preview” to generate a Late Charges preview.  Depending on the number of charges, this may open automatically, or you may receive a message that it has started as a Background Task to allow you to keep working while it is being generated.  If you receive this message, just click on the “Background Tasks” icon in the bottom left-hand corner of the screen to open it, then click on the task result to open the Preview in a new tab.

When the Preview opens, you will see a list of all Families, the number of active students, how much they owe in overdue charges and how much they owe in total, and how much they will be assessed for a late fee based on your settings.

Once the preview looks correct to you, you can process it by pressing the “Process” button at the bottom left-hand side of the list. When you process the preview, it places the charges on the Family ledger, but does not collect payments.


Anniversary Charges
The “Anniversary Charges” task is used to assess a charge to all active families or students who have not been charged an Anniversary Fee within the Anniversary timeframe you have set up under SETTINGS > SETUP > GENERAL SETTINGS > ANNIVERSARY FEES. (The task will charge once per family or once per student depending on your settings.)

To access the “Anniversary Charges” task, click on the TRANSACTIONS button on the right-hand side of the blue toolbar at the top of the screen.  On the menu on the left-hand side of the screen, choose “Anniversary Charges.”


To create Anniversary Charges:

  • Choose the Charge Category and Income Program that will be assigned to the charge that will be created.
  • Under “Enrolled In”, choose which enrollments the system when consider when determining if a student is active or not. You can choose to look at class enrollments only, camp enrollments only, or any enrollment at all (this is the default setting).
  • On the “Student Active” filter, choose the appropriate option based on how you want the system to consider active enrollments. The system uses the student active “As of Date” as the starting point to see if the family or student has been charged within your Anniversary timeframe (if “In the Month of” is selected, it uses the last day of that month). For example, if the charge date is February 1st, the system will use the date of February 1st as a starting point and count back the number of months established in your Anniversary timeframe settings and produce a list of anyone who has not been billed.
    • “In Month Of” will look at all enrollments in the month you choose, regardless of whether the enrollment drops during the month or not.  As long as the student was active at some point within the month, they will be considered active.
    • “As of Date” will look at all enrollments on the date you specify and will ignore any enrollments that drop before that date or start after that date. The student must be active on the date you choose to be considered active.
  • Specify the Charge Date and Due Date of the charge that will be created.
  • If you charge tax for Anniversary Fees, check the “Charge Tax” box and choose the appropriate tax rate.
  • If you want to charge all Active families or students regardless of whether or not they have been charged within your Anniversary timeframe, you can check the “Ignore Previous Anniversary Charges” option to disable duplicate charge detection.
  • If you would like to override your specified Anniversary Fee amount for all active families or students being charged, you can enter an amount in the “Override Anniversary Fee” field.  This will not override the fee for customers who already have an override amount set on the family or student record.

Once all of your options have been entered, click “Preview” to generate an Anniversary Charges preview.  Depending on the number of charges, this may open automatically, or you may receive a message that it has started as a Background Task to allow you to keep working while it is being generated.  If you receive this message, just click on the “Background Tasks” icon in the bottom left-hand corner of the screen to open it, then click on the task result to open the Preview in a new tab.

When the Preview opens, you will see a list of all Families or Students (depending on your billing option), their Anniversary Charge Eligibility Date, Last Billed Date, the amount they were billed, tax amount and how much they will be charged. If you find any discrepancies, you may need to edit the family ledger to correct them, then generate a new Anniversary Charges preview so the system will use the latest updates when calculating prices. You can also download this preview as a CSV file to open in your spreadsheet software if you prefer using the “Save as CSV” option at the bottom of the list. (If you do make changes, it is a good idea to delete the previous preview from the Background Tasks so it is not accidentally opened and processed instead.)

Once the preview looks correct to you, you can process it by pressing the “Process” button at the bottom left-hand side of the list. When you process the preview, it places the charges on the Family ledger, but does not collect payments.

show more show less

Lesson 10: Payments

In this lesson, payments and credits are discussed in detail – including the different ways that payments can be added to customer accounts (including the process of collecting recurring payments) and which payment types or actions require a gateway integration to process. In this lesson, payments and credits are discussed in detail – including the different ways that payments can be added to customer accounts (including the process of collecting recurring payments) and which payment types or actions require a gateway integration to process.

Once charges have been created, you must create a payment on the Family Ledger to apply to the charge and balance it out.  Payments can be created in two ways: Individually on the Family Ledger, or in Batch Payment tasks for charging families with saved payment information.

Let’s look at these one at a time.

Individual Payments
You can create a new payment on a family ledger by clicking the “New Payment” button.  This button is available from the “Ledger” portion of the Family Details screen, from the mini-ledger view accessible by clicking the currency symbol next to the name of the account on the Families or Students screen, or from the Full Ledger (accessible on both of the screens we just mentioned).

Within the “New Payment” window, there are two types of transactions you can record – Payments and Credits.  A “Payment” is any payment where the customer pays you in a standard payment form (credit card/eCheck/cash/check).  A “Credit” is any payment where you are issuing the customer credit (such as a scholarship/stipend or any other type of credit where no form of currency passes from the customer to you).


To create a PAYMENT, you will need to fill out the following fields:

  • Payment Title
  • Payment Type – there are a number of payment types available:
    • Credit Card on File – this is selected to use the saved payment information the family has on file to make a one-time credit card payment. (This option is only enabled if you have a payment gateway configured that allows you to save payment information.)
    • Credit Card Manual – this is selected to manually enter credit card information to make a one-time credit card payment. (This option is only enabled if you have a payment gateway configured.)
    • Credit Card Swipe – this is selected to use a USB card swiper to swipe the magnetic strip on a credit card to make a one-time credit card payment. (This option is only enabled if you have a payment gateway configured.)
    • E-Check – this is selected to use the saved payment information the family has on file to make a one-time eCheck payment. (This option is only enabled if you have eCheck processing configured on your account.
    • External Credit Card Device – this is selected to manually enter payment information about a credit card payment that was taken externally, such as on a credit card terminal enabled to read chip-embedded cards.  (Note that the actual transaction is run through the terminal and these payments cannot be refunded directly through iClassPro.)
    • Cash – this is selected to manually enter a cash payment.
    • Check – this is selected to manually enter a payment made with a traditional written check (not eCheck).
  • Payment Amount
  • Reference/Check Number – this field is optional, but is recommended if you need to record additional information, such as the transaction ID of an external credit card payment or the number on a check that was used to make a payment.
  • Apply to Outstanding Charges – this section lists any outstanding charges on the family ledger and allows you to choose which charges to apply the payment to.  If you do not select any charges the payment will be recorded but not applied, and will show as an “Unapplied Payment” until you choose to apply it.

Once you have the fields filled out correctly, simply press “Process Payment” to create the payment on the Family Ledger and apply it to outstanding charges (if you chose to do so).


To create a CREDIT, you will need to fill out the following fields:

  • Payment Title
  • Credit Type – there are a number of payment types available.  You can choose to apply these in whatever manner works best for your facility (for example, you might use “House” to record scholarships or stipends, and “Coupon” to record other forms of credit):
    • Coupon
    • House
    • Other
  • Credit Amount
  • Reference/Check Number – this field is optional, but is recommended if you need to record additional information.
  • Apply to Outstanding Charges – this section lists any outstanding charges on the family ledger and allows you to choose which charges to apply the credit to.  If you do not select any charges the credit will be recorded but not applied, and will show as an “Unapplied Payment” until you choose to apply it.

Once you have the fields filled out correctly, simply press “Process Payment” to create the credit on the Family Ledger and apply it to outstanding charges (if you chose to do so).

Important Note: If you fill out both the payment and credit sides of the screen, a payment will be created that is half traditional payment and half credit, effectively doubling the amount payment.  Be sure you only fill out the side of the New Payment screen you need as there is not a way to edit the payment to remove the incorrect information.


Batch Payments
You can use the “Payments” task under the TRANSACTIONS menu to create batch payments to process payments for families who have saved payment information on file that is authorized for recurring billing.  When using the Payments task, families without saved payment information, or who do not have the “This payment method is authorized for recurring billing” option checked on their Payment Options tab will not be included in the results.

To run the Payments Task

  • Click the TRANSACTIONS icon on the right-hand side of the blue toolbar at the top of the screen.
  • Click PAYMENTS on the menu on the left-hand side of the screen.
  • On the “Auto-Payments” task menu, select the appropriate option:
    • Apply Credits and Unapplied Payments – choose this option to look for families with outstanding charges who also have unapplied payments on their ledger. Applying the unapplied payments will reduce the amount the family will have charged when you run the actual task to collect payment from their merchant account and may keep some families from being drafted any money at all (if they have enough unapplied payments to cover their current charges).
    •  
    • If you are particular about which credits/payments get applied to particular charges, we recommend that you manually apply credits and DO NOT use this option, as it will apply any unapplied payments to any outstanding charges.
    • Charge from Merchant Account – choose this option to charge the family’s saved payment method on file for any outstanding charges. (Families without saved payment information, or who do not have the “This payment method is authorized for recurring billing” option checked on their Payment Options tab will not be included in the results.)
    • Generate Nacha – choose this option to generate a NACHA file to be uploaded to your bank to process bank transfers. (This method requires that you have NACHA settings configured and enabled under SETTINGS>TRANSACTIONS>CONFIGURE ACH SETTINGS.)
  • Under “Charge Category”, you can select a specific charge category to process only outstanding charges with that charge category attached, or leave it set to ALL to look for outstanding charges with any charge category attached.
  • If processing payments only for currently Active families, set the “Family Status” filter to ACTIVE.  Otherwise, you can leave it set to ALL.
    Important Note: If you are processing payments for families who have already been charged for a future enrollment (for example, processing fees for September enrollments at the end of August), you may want to leave the Family Status filter set to ALL, as the September enrollments may not be active yet).
  • The “Bill” Filter can be used to process payments for charges that have are due on or before a specific date.
    • Choosing “Due On or Before” will look only at charges that have a due date assigned that is on or before the date you specify.  All charges with a due date AFTER that date will be ignored.
    • Choosing “Due On” will look only at charges that have a due date assigned that matched the date you specify.  All charges with a due date BEFORE or AFTER that date will be ignored.
    • Choosing “All Outstanding Charges” will ignore the due date on the charge completely.  All charges will be included if they match any of the other criteria you may have selected, such as Charge Category or Line Item Type. (Choosing this option will remove the field to set a due date.)
  • “Minimum Payment Amount” – by default, this is set to $1.00.  You can enter a different amount if you wish and the system will ignore any outstanding charges that are lower than the amount entered.
  • The next four checkboxes are Line Item Types.  Deselecting a particular Line Item Type means the system will ignore charges of that type when looking at the outstanding charges.
  • Keywords – selecting a Family, Student, Class or Camp keyword here will limit the results only to specific families who are associated with that keyword.


Once you have your filters set, click the “Preview” button. Depending on the number of charges, this may open automatically, or you may receive a message that it has started as a Background Task to allow you to keep working while it is being generated.  If you receive this message, just click on the “Background Tasks” icon in the bottom left-hand corner of the screen to open it, then click on the task result to open the Preview in a new tab.

When the Preview opens, you will see the names of the families, any credit available and how much the families owe in outstanding charges that meet the criteria you set in the filters.

If you are running the “Apply Credits and Unapplied Payments” Task, the amount of credit shown will be applied to the outstanding charges if you choose to Process the preview. A results file will be generated in your background task to show the application of the unapplied payments.

If you are running the “Charge from Merchant Account” Task, the amount of the outstanding charges will be processed to the family’s credit card on file if you choose to Process the preview. A results file will be generated in your background task to show successful or failed payments.

If you are running the “Generate Nacha” Task, a payment will be created on the family’s account in the amount of the outstanding charges if you choose to Process the preview. A NACHA file will be generated in your background tasks that can be downloaded and transmitted to your bank.

Important Note: because iClassPro does not directly integrate with your bank or the eCheck processor, there is no immediate confirmation as to whether those payments are successful or not. iClassPro creates a payment on the ledger in the expectation that it will be successful; however, if you receive word that the payment failed you will need to go into the family record and adjust the ledger accordingly.

show more show less

Lesson 11: Customer (Parent) Portal > General Setup

This lesson is the first of three lessons which cover the parent portal setup process in detail. This video concentrates on general options for what is visible online and how your parent portal is branded to blend more seamlessly with the design of your website. This lesson is the first of three lessons which cover the parent portal setup process in detail. This video concentrates on general options for what is visible online and how your parent portal is branded to blend more seamlessly with the design of your website.

The Customer Portal is the part of iClassPro that your customers will see, and where they will create enrollments and make payments (if you have a payment gateway configured). There are several sections in the setup area, with several options to consider about how the system will handle enrollments, charges, and payments.  Let’s look at each section individually:
 

Policies

Under SETTINGS>POLICIES, you will enter your “Rules, Terms and Conditions”, “Waiver” and “Billing Authorization” policies.  The first time a visitor logs into their account through the Customer Portal, they will be required to agree to all three policies before they can continue.
 

Website Integration

Under SETTINGS>CUSTOMER PORTAL>WEBSITE INTEGRATION, you will find three lines of HTML code that can be used to link to your existing Website to the Customer Portal.  To ensure the security of personal and financial information, there is no direct API or other integration with the Customer Portal at this time.

The lines of code will create buttons that link your visitors directly with certain pages on the Customer Portal: the first line of code will link them to your CLASSES page, the second line will link them to the main login page, and the third line will link them to the page to create a new account.

If you only want to link to one particular page we generally recommend linking to the main login page since there are links to the other two pages from there.  If you do not wish to use the buttons that the code generates, you can use your own graphics or other means to link directly to your Customer Portal using the URL specified within the second section of code. (This link begins with https and ends with your account name.

Below the lines of code, you will find a button to “Preview Parent Portal”, which will launch the main login page in a new window.


Marketing and Branding

SETTINGS > CUSTOMER PORTAL > MARKETING AND BRANDING is where you will customize your Customer Portal, including the avatar/logo, color theme and announcement text that your families will see when they visit the main login page.  There are a number of options here:

Default Parent Portal Header Image
As mentioned in the “Location Settings” lesson, your Customer Portal Header graphic is actually uploaded to the SETTINGS > LOCATIONS area.  The “Default Parent Portal Header Image” here is only used if you have multiple locations and serves as a placeholder until your customers select a specific location to view classes.


Avatar/Logo
The Avatar/Logo is displayed beneath the menu on the left-hand side of the Customer Portal, and is also used as the logo when generating Student Skill Evaluation Reports.

Select a Color Theme
Use the color picker here or manually enter a hex color value to select a color theme for your Customer Portal to make it blend in as much as possible with your external Website.  This theme will affect the background color of all menus and buttons, including the buttons generated using the HTML code from the “Website Integration” section.

Announcement Text
This text will be displayed on the main landing page of your Customer Portal in the “Home” section, just above the fields where your visitors will enter their email address and password to log in.

Google Analytics
If you have a Google Analytics key, you can enter it here so Google can record information about visits to your Customer Portal.


General Options

SETTINGS > CUSTOMER PORTAL > GENERAL OPTIONS is where you will define what the Customer Portal will display to visitors and whether or not you will allow certain types of requests. We will look at each option individually:

Allow Visitors to Create New Accounts Online
If this option is enabled, any visitor will be able to create a new family account through the Customer Portal.  If you disable the option, they will have to contact you in order to establish an account, meaning that only families who have a current or past enrollment will be able to log in.

Require New Accounts to Enter a CAPTCHA
CAPTCHA is a security feature that requires visitors to interact with the system in order to create an account.  If you’ve ever filled out a form online that asked you to enter the text shown in a graphic to prove you’re not a robot – that’s a CAPTCHA.  We generally recommend enabling this feature if you notice a large number of new accounts being created, especially if those accounts are not creating enrollments.

Show Camps and Allow Visitors to Register for Theme
If you offer camps and want visitors to be able to enroll in those camps online, you will need to enable this option in order for the camps to show on your Customer Portal.

Show Parties and Allow Visitors to Register for Theme
If you have the iPartyPro add-on and want visitors to be able to enroll in parties online, you will need to enable this option in order for the parties to show on your Customer Portal.

Show Class/Camp/Party List if Not Logged In
This option should be enabled if you want visitors to be able to browse your class, camp or party lists without establishing an account. Otherwise, visitors will need to log in before they can view anything.

Show FULL or OPEN Instead of Number of Openings
If this option is not enabled, the system will show the actual number of openings in a class in the “Openings” box to the left of the class listing.  If it is enabled, the system will only show FULL or OPEN. (Note that due to the possibility of different camp blocks having different numbers of openings, camps will always display FULL or OPEN.)

Show Class/Camp Levels
Enabling this option will show the Class or Camp Level along with the other class or camp information.  If you do not use levels, you can disable this option.

Show Tuition Amounts
Enabling this option will show the Tuition attached to the class along with the other class information.  We generally recommend disabling this option if you bill hourly, since the hourly Tuition rate is not what you will actually charge for the class.  The full calculated Tuition will be shown once the family adds the class enrollment to their cart.

Allow Drop Request
Enabling this option will allow visitors to request a drop for an existing enrollments and specify the drop date.  This will be submitted as a request that a staff member must approve or deny.  Disabling this option will not show the drop option when viewing existing enrollments.

Allow Transfer Request
Enabling this option will allow visitors to request a transfer from an existing enrollment to a new class and specify the date they would like to begin the new class.  This will be submitted as a request that a staff member must approve or deny.  Disabling this option will not show the transfer option when viewing existing enrollments.

Show Full Class Descriptions if Not Logged In
This option should be enabled if you want visitors to be able to be able to click the “More Details” option in your class or camp list without establishing an account. Otherwise, visitors will need to log in before they can view full descriptions.

Default Session to Show on the Class List
If you choose a specific Session or Rolling Session from this list, only classes attached to that Session will display by default, and all openings will reflect openings in that particular Session.  If you have the Session filter enabled, visitors will still be able to switch to viewing a different Session if desired, and if more than one Session is attached to a class they will still be able to switch Sessions on the enrollment screen to enroll in a different current or future Session.


Important note:
If you have some classes that are Session-based and some that are not, setting a default Session means that non-Session classes will not appear on your Customer Portal unless customers change the Session filter to show no Session at all.


Sort Classes/Camps
Use this filter to choose whether to sort your class and camp listings by Date/Time or By Name.  “Date/Time” means they classes will sort chronologically, so your Sunday classes would show first, from the earliest in the day to the latest, then Monday classes and so on.  Sorting “By Name” means that they will be listed alphabetically by class or camp title.

Default Location
If you have more than one location set up in your account, you can set a location here if you want the system to automatically default to that location first.  If you leave it blank your visitors will see a generic landing screen with all locations listed.  The system would use the “Default Parent Portal Header Image” defined under SETTINGS > CUSTOMER PORTAL > MARKETING AND BRANDING until a specific location is chosen.

show more show less

Lesson 12: Customer (Parent) Portal > Class & Camp Options

This lesson is the second of three lessons which cover the parent portal setup process in detail. This video will focus on the options available for setting up online class and camp registration. This lesson is the second of three lessons which cover the parent portal setup process in detail. This video will focus on the options available for setting up online class and camp registration.

When it comes to how the Customer Portal will handle Class and Camp Enrollments, there are many options to consider. Let’s take a look at the next three sections of the Customer Portal setup area.


Class Registration

SETTINGS > CUSTOMER PORTAL > CLASS REGISTRATION is where you will define how the Customer Portal will handle certain types of enrollments, and how it will handle charges and payments related to those enrollments. We will look at each option individually:

Count Class Requests Against Openings
As we will see in a few minutes, there are a several ways that an enrollment can be submitted as a request as opposed to it being automatically approved.  This setting determines how you want the system to handle those requests in relation to the number of openings shown.

Enabling this option counts a request against the number of openings, essentially “reserving” the spot in the class until you tell the system how to handle it by approving or denying the request.  If you disable this option, only approved requests will count against openings, which may result in having no openings available when you go to approve or deny an enrollment request.

Allow Visitors to Choose a Start Date for Non-Session Classes
Enabling this option allows visitors to request a specific start date when enrolling in a class without a Session attached (if a Session is attached, the enrollment inherits the start date of the Session as the enrollment start date). If you enable this option, you will need to specify in the box below the maximum number of days in the future that they can use as the start date to be (so entering “7” would mean that they cannot request a start date more than a week in the future).

Allow Visitors to Request a Class That is Full
Enabling this option allows visitors to request a class that has no openings available.  The enrollment would be submitted as a request, meaning there would be no charge created automatically (if you have the option to “Auto-Charge First Tuition” enabled).  If you approve the request, you will need to decide whether you will allow it to overbook the class (by keeping it as an Active enrollment) or make it a Wait List enrollment. Disabling this option means that the system will not allow the visitor to complete the enrollment process for the class at all.

Allow Visitors to Request a Specific Enrollment Type Such as Active, Trial or Makeup
Enabling this option allows visitors to request a specific enrollment type in a class. If this option is disabled, all enrollments through the Customer Portal will be “Active” type enrollments.  By enabling this option, visitors will be able to request a “Trial” or “Makeup” enrollment instead. These will be submitted as a request that a staff member must approve or deny.

Be aware that iClassPro does not charge for “Trial” or “Makeup” enrollments, so be sure to set a drop date when approving these enrollments, otherwise the student will remain enrolled in the class but will never be charged for it.

Allow Visitors to Request a Class for a Student Who Does Not Meet Class Requirements Such as Age, Gender or Level
Enabling this option allows visitors to request a class where the student does not meet the age or gender requirements you have set up.  The enrollment would be submitted as a request, meaning there would be no charge created automatically (if you have the option to “Auto-Charge First Tuition” enabled). Disabling this option means that the system will not allow the visitor to complete the enrollment process for the class at all.

Allow Visitors to Request a Drop Date on New Enrollment Requests
Enabling this option allows visitors to request a specific drop date when enrolling in a class. If the option is disabled, they will not be able to request a drop date, meaning that they will inherit the Session end date as their drop date (if the class uses Sessions), or remain enrolled until they contact you to set a drop date (if the class uses Rolling Sessions or no Session at all).

Allow Visitors to Override Default Billing Schedule
If you have multiple Billing Schedules attached to your classes, enabling this option will allow visitors to choose a specific Billing Schedule when they enroll.  If you leave the option disabled, they will automatically be enrolled in the default Billing Schedule that is selected on the class.

Auto-Approve Requests (Live Enrollments)
Enabling this option means that the system will automatically approve class enrollments as long as the student meets the age and gender requirements, and as long as there is an opening for them.  If the student does not meet the requirements, or if there is not an opening, then the system will not automatically approve the enrollment and will handle it according to the options that you set up earlier.

Send Email Notification Upon Auto-Enrollment to Email Address of Class Location
Enabling this option will send a notification to the gym whenever an enrollment is automatically approved.  The system will send the email to the address specified under SETTINGS > LOCATIONS. If the enrollment is not automatically approved and submitted as a request, no email will be sent.

Auto-Charge First Tuition
If you enable this option, the system will create a charge for the first class Tuition on the family ledger if the enrollment is automatically approved.  If you do not have the option to “Auto-Approve Requests” enabled, or if the enrollment was submitted as a request, then the system will not create a charge.

Note that enabling this option only creates the charge on the ledger and does not require the family to make a payment.  That option is handled separately.

Anniversary Fee (If Not Paid in the Last 12 Months, or Based on Your Timeframe)
If this option is enabled, the system will automatically create an Anniversary Fee per family or student if they have not been charged within your specified timeframe (as defined under SETTINGS > SETUP > GENERAL SETTINGS > ANNIVERSARY CHARGES).

Important Note: This setting requires that both “Auto-Approve Requests” and “Auto-Charge First Tuition” are enabled.  At this time the system will not create the Anniversary Fee charge unless it also creates a Tuition charge.

Require Payments for Enrollments
Enabling this option will require that a full payment be made when submitting an enrollment. This setting requires that both “Auto-Approve Requests” and “Auto-Charge First Tuition” are enabled.

Important Note: When the payment information is entered, it will be used for that payment only and will only be saved to the family account if you have the “Require Saved Payment Method Authorized for Recurring Billing” option enabled under SETTINGS>CUSTOMER PORTAL>FINANCIAL.

Auto-Created Charges Set the Due Date to X Days in the Future
The system will set the due date for any automatically created charges (such as the Tuition charge or the Anniversary Fee) the number of days in the future that you enter into this box.  If you do not require payments for enrollments, this gives families a few days to pay before the charge is considered past due.

Auto-Charge Charge Category
The system uses this Charge Category for all Tuition charges created through the Customer Portal. You can change this monthly, or you can leave it set to a generic charge category such as “Online Tuition” and run a Category List report prior to running Class Tuition Charges to help prevent duplicate charges.

Note that the Program associated with the charge will be the same Program attached to the class being charged.

Auto-Approve Tax Rate
If you charge tax on Tuition fees, you will need to select the appropriate tax rate here so tax will be added to the charge.

Anniversary Fee Charge Category
The system uses this Charge Category for all Anniversary Fee charges created through the Customer Portal.

Anniversary Fee Tax Rate
If you charge tax on Anniversary fees, you will need to select the appropriate tax rate here so tax will be added to the charge.

Anniversary Fee Program
The system uses this Program for all Anniversary Fee charges created through the Customer Portal.


Class Filters

SETTINGS > CUSTOMER PORTAL > CLASS FILTERS is where you will define which filters are available for visitors to use on the Classes page in the Customer Portal.  These are:

• Age Filter
• Gender Filter
• Program Filter
• Session Filter
• Day Filter
• Level Filter

You may wish to disable filters for any options you do not use (such as Sessions or Levels).


Camp Registration

SETTINGS > CUSTOMER PORTAL > CAMP REGISTRATION is where you will define how the Customer Portal will handle certain types of camp enrollments, and how it will handle charges and payments related to those enrollments. We will look at each option individually:

Count Camp Requests Against Openings
As we will see in a few minutes, there are a several ways that an enrollment can be submitted as a request as opposed to it being automatically approved.  This setting determines how you want the system to handle those requests in relation to the number of openings shown.

Enabling this option counts a request against the number of openings, essentially “reserving” the spot in the camp until you tell the system how to handle it by approving or denying the request.  If you disable this option, only approved requests will count against openings, which may result in having no openings available when you go to approve or deny an enrollment request.

Allow Visitors to Request a Camp That is Full
Enabling this option allows visitors to request a camp that has no openings available.  The enrollment would be submitted as a request, meaning there would be no charge created automatically (since the system does not know if you will approve the request or not).  If you approve the request, you will need to manually create the camp Tuition charge on the family ledger. Disabling this option means that the system will not allow the visitor to complete the enrollment process for the camp at all.

Allow Visitors to Request a Camp for a Student Who Does Not Meet Camp Requirements Such as Age or Gender
Enabling this option allows visitors to request a camp where the student does not meet the age or gender requirements you have set up.  The enrollment would be submitted as a request, meaning there would be no charge created automatically (since the system does not know if you will approve the request or not).  If you approve the request, you will need to manually create the camp Tuition charge on the family ledger. Disabling this option means that the system will not allow the visitor to complete the enrollment process for the camp at all.

Require Payment When Modifying a Camp Schedule
If the option to “Allow Visitors to Modify Camp Schedule” is enabled, then selecting this option will require the visitor to pay a fee when making the change to the schedule.  This fee is determined by the next setting.

When Charging for Modified Schedules
This option determines what the visitor will be required to pay when modifying the camp schedule.  “Charge the Difference” means the visitor will only be required to pay the difference between the original camp Tuition charge and the added camp blocks, even if they still owe for the original charge. “Charge the Remainder Owed” means they will be required to pay all of the original remaining fee as well as the cost of the added camp blocks.

Charge Nothing if Deposit Due Only is Set on the Camp When Modifying a Schedule
Enabling this option means that the visitor will not be required to pay anything if the camp for which they are modifying the schedule has “Deposit Due Only” selected as the “Amount Due at Signup” (since technically the already paid the deposit when they first registered).

Anniversary Fee (If Not Paid in the Last 12 Months, or Based on Your Timeframe)
If this option is enabled, the system will automatically create an Anniversary Fee per family or student if they have not been charged within your specified timeframe (as defined under SETTINGS>SETUP>GENERAL SETTINGS>ANNIVERSARY CHARGES).

Important Note: This setting requires that “Auto-Approve Requests” is enabled on the camp’s “Parent Portal” tab.  At this time the system will not create the Anniversary Fee charge unless it also creates a Tuition charge.

Allow Visitors to Modify Camp Schedule
Enabling this option will allow visitors to add additional camp blocks to an existing enrollment if “Allow Parents to Choose Days” is enabled on the camp’s “Parent Portal” tab.

Auto-Approve Charge Category
The system uses this Charge Category for all Tuition charges created through the Customer Portal.

Note that the Program associated with the charge will be the same Program attached to the camp being charged.)

Send Email Notification Upon Auto-Enrollment to Email Address of Camp Location
Enabling this option will send a notification to the gym whenever an enrollment is automatically approved.  The system will send the email to the address specified under SETTINGS > LOCATIONS. If the enrollment is not automatically approved and submitted as a request, no email will be sent.

show more show less

Lesson 13: Customer (Parent) Portal > Financial Options

This lesson is the third of three lessons which cover the parent portal setup process in detail. This video will explain the options your business has for financials in the parent portal, such as whether customers are required to store payment information on file or if they are able to use Promo Codes which have been created in the system at checkout. This lesson is the third of three lessons which cover the parent portal setup process in detail. This video will explain the options your business has for financials in the parent portal, such as whether customers are required to store payment information on file or if they are able to use Promo Codes which have been created in the system at checkout.

SETTINGS > CUSTOMER PORTAL > FINANCIAL is where you will define how the Customer Portal will handle financial matters pertaining to family accounts and ledgers. Let’s look at each option individually:


List Visa/Mastercard/Discover/American Express as an Accepted Credit Card
Enabling any of these options simply displays an image of that card on the screen where a visitor enters their credit card information.  It is important to note that this does not actually determine whether that card is accepted or not – that is defined by the gateway settings with your credit card processor.

Require Saved Payment Method Authorized For Recurring Billing
Enabling this option means that visitors will be required to enter payment information before they can complete the enrollment process, and this information will be saved to their family profile and marked as Authorized for recurring billing.  Whether a payment is actually run when they enter this information is determined by whether or not you have the “Require Payments for Enrollments” option enabled under SETTINGS>CUSTOMER PORTAL>CLASS REGISTRATION.

If this option is enabled, families will not be able to delete their saved payment information.

Require Recurring Billing for Trial Enrollments
Enabling this option means that visitors will be required to enter payment information before they can complete the enrollment process, even if the enrollment type is set to “Trial.”  Since iClassPro does not charge for Trial enrollments, you may wish to disable this option so families do not think they are being charged.

Show Full Ledger History, Not Just the Last 30 Day History
Visitors are able to view their ledger from the Customer Portal.  By default, this is limited to viewing charges and payments within the last thirty days.  If you wish to allow them to view their entire ledger history you will need to enable this option.

Allow Visitors to Generate a Statement
Since visitors are able to view their ledger history from the Customer Portal, enabling this option will give them the ability to generate their own statement based on current charges and payments. If this option is disabled, they will need to contact your staff to have a statement printed or emailed to them.

Show the Account Credit in the Ledger
Enabling this option will show any available credit on the family ledger in the Customer Portal.  However, there is not a way at this time to allow visitors to apply credits themselves. If you leave this option disabled credit will not be shown.

Allow Partial Payments
Enabling this option will allow visitors to make partial payments towards charges that have not yet reached their due date. Charges that are auto-created during the enrollment process and charges that are past due will still require payment in full. If you choose to enable partial payments, you will need to define the minimum payment amount in the “Minimum Partial Payment Amount” field.

Allow Promo Codes
If you have set up Promo Codes and wish to allow parents to enter them at the Customer Portal, you will need to enable this option so the “Promo Code” field will show during the checkout process.

Require Past Due and Priority Charges Must Be Paid in Full First
If you enable this option, the system will check to see if there are any outstanding charges with the Charge Category you specify when a visitor makes a payment.  If there is an outstanding charge, they will be required to pay at least one of them before they can make a payment towards a charge that is not yet due.

The drop-down menus set the priority order: the system looks for a charge of the “Priority Charge Category 1” type first; if there is no charge that uses that Charge Category it will look for “Priority Charge 2” and so on.

show more show less

All Videos

Lesson 1: Logging Into iClassPro
01:42
CURRENTLY PLAYING

Lesson 1: Logging Into iClassPro

The focus of this lesson is on logging into the software, bookmarking your unique staff login page and our recommendations for compatible web browsers when using iClassPro.

Lesson 2: Business Settings
01.27
CURRENTLY PLAYING

Lesson 2: Business Settings

This lesson will walk you through entering your essential business settings to get your account started off on the right foot - such as contact information which our staff will use to communicate with your business. Other settings covered in this video are essential to account setup – such as your country of business, currency, time zone, date format and more.

Lesson 3: Location Settings
03.05
CURRENTLY PLAYING

Lesson 3: Location Settings

This lesson will explain how to update your location information which will be visible to customers in the parent portal for online registration.

Lesson 4: Creating Staff Users
02:31
CURRENTLY PLAYING

Lesson 4: Creating Staff Users

This lesson will cover creating unique staff users to enable them to login with specific permissions/access. Adding staff members to the iClassPro system also enables the staff members to show as possible instructors to attach to classes and camps later on.

Lesson 5: Creating Family & Student Records
03:13
CURRENTLY PLAYING

Lesson 5: Creating Family & Student Records

In this lesson, you will learn how to create families and add students to the system and how to customize the available fields for your needs.

Lesson 6: Creating Your Class Schedule
06:36
CURRENTLY PLAYING

Lesson 6: Creating Your Class Schedule

In this lesson, you will learn about the essential settings for classes and how to create them. Classes are best used for tracking enrollments which last several weeks or longer on a recurring schedule.

Lesson 7: Setting Up Discounts
05:29
CURRENTLY PLAYING

Lesson 7: Setting Up Discounts

In this lesson, class discounts are explained in detail. Discount schedules are available to offer multiple class or multiple sibling discounts for class enrollments.

Lesson 8: Creating Your Camp Schedule
08:47
CURRENTLY PLAYING

Lesson 8: Creating Your Camp Schedule

In this lesson, you will learn about the essential settings for camps and how to create them. Camps are best used for tracking short term enrollments and one-time events. They can be set up with a forced schedule or a flexible one where customers can select one or more time periods within the camp to attend.

Lesson 9: Charges
19:16
CURRENTLY PLAYING

Lesson 9: Charges

In this lesson, charges are discussed in detail – including the different types of charges, why they are important and the different ways that charges can be added to customer accounts (including mass charging).

Lesson 10: Payments
10:42
CURRENTLY PLAYING

Lesson 10: Payments

In this lesson, payments and credits are discussed in detail – including the different ways that payments can be added to customer accounts (including the process of collecting recurring payments) and which payment types or actions require a gateway integration to process.

Lesson 11: Customer (Parent) Portal > General Setup
09:17
CURRENTLY PLAYING

Lesson 11: Customer (Parent) Portal > General Setup

This lesson is the first of three lessons which cover the parent portal setup process in detail. This video concentrates on general options for what is visible online and how your parent portal is branded to blend more seamlessly with the design of your website.

Lesson 12: Customer (Parent) Portal > Class & Camp Options
13:49
CURRENTLY PLAYING

Lesson 12: Customer (Parent) Portal > Class & Camp Options

This lesson is the second of three lessons which cover the parent portal setup process in detail. This video will focus on the options available for setting up online class and camp registration.

Lesson 13: Customer (Parent) Portal > Financial Options
04:03
CURRENTLY PLAYING

Lesson 13: Customer (Parent) Portal > Financial Options

This lesson is the third of three lessons which cover the parent portal setup process in detail. This video will explain the options your business has for financials in the parent portal, such as whether customers are required to store payment information on file or if they are able to use Promo Codes which have been created in the system at checkout.